


Prairie Homestead Upstairs Remodel 2021: Flooring
Posted January 4, 2022 by Prairie Wife -
This last weekend (over Christmas) was our time to get done with Phase 2 of our Prairie Homestead Remodel, FLOORING.
In case you missed it, here is my overall plan/dream, and here is a post about Phase 1 which was PAINTING.
Previously our home had a dull grey carpet in all of the rooms, and the carpet in the three upstairs bedrooms was 13 years old…and had made it through potty training 5 Cowkids and 3 dogs. About 9 years ago we replaced the gray carpet in the dining room and hallway with linoleum flooring (in a blond hardwood design).
Thanks to The Cowboy’s mad skills and all the help we received from the 5 Cowkids we accomplished putting new flooring in four rooms and the hallway in four and a half days.
It took us about 8 hours from start to finish to do the smaller bedrooms, and that includes taking out furniture, pulling off the trim, tearing up carpet, pulling staples, laying the new flooring, and putting new trim up…and getting the furniture back in.
This does NOT include the massive purge that occurred in each room, since we were moving stuff around anyway!
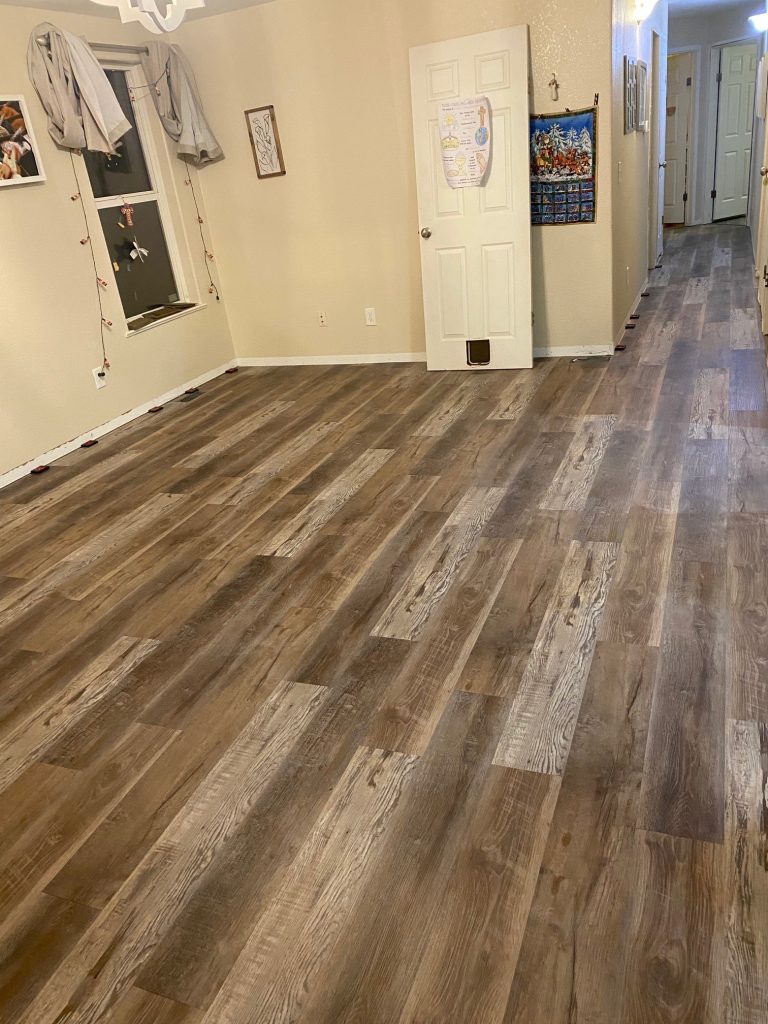
We used Floating Luxury Vinyl Plank Flooring from Menards.
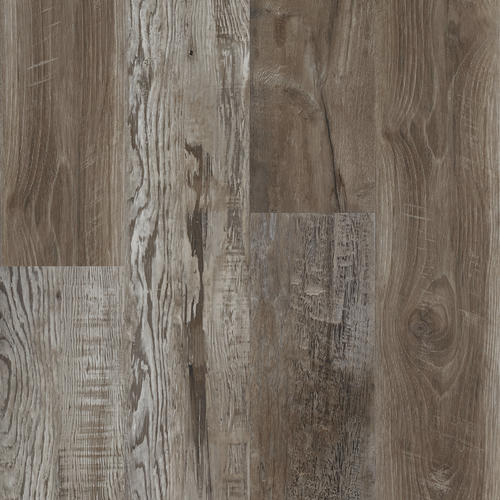
The color we chose was “Weathered Driftwood” and it was the right fit for us. It has gray tones with a mix of several shades of brown and white, so it goes with everything in our home.
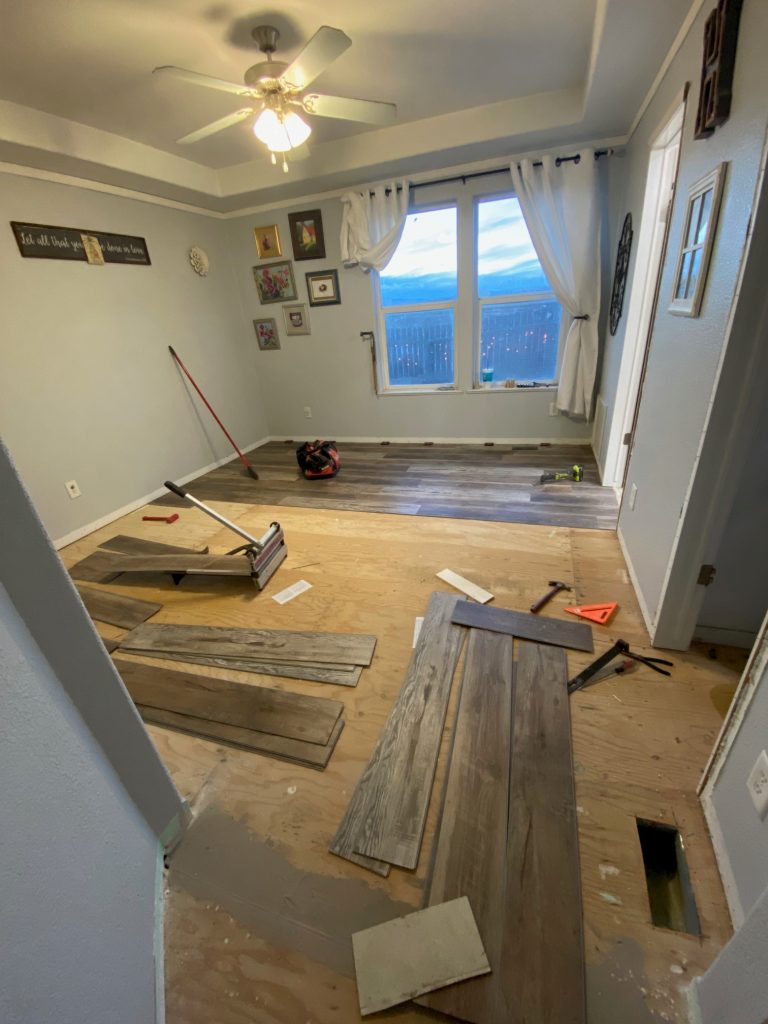
The hardest part of the process was removing the carpet, and there were definitely a few tips and tricks we learned along the way that made things go faster.
Below are a few things we learned that may help you if you plan to tackle a project like this.
- Make sure your floors are totally clean, no staples, no small pebbles…nothing. It’s crazy how even the smallest bit of dirt can cause a problem when snapping your flooring in.
- Make a plan for where you’re going to start and finish. The direction of flooring and where you end up will impact how the entire room looks. We planned to use transitions in our doorways because we didn’t want to have to worry about matching the flow of the flooring with the hallway.
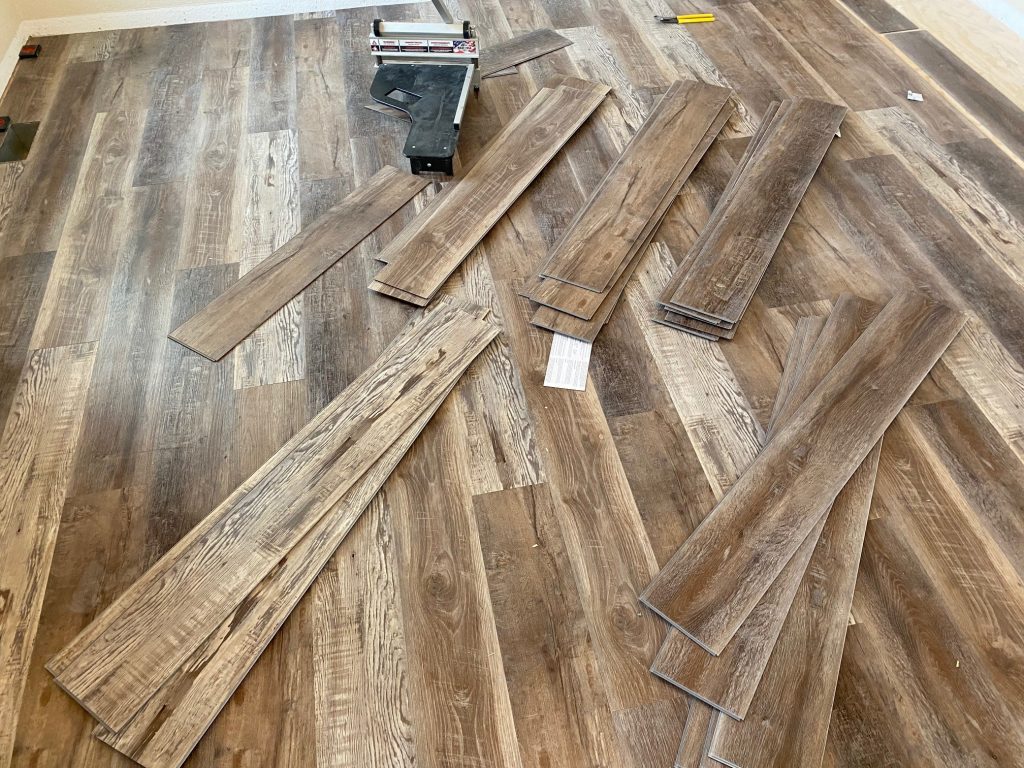
- Sort the planks by pattern, so that when you place them you can make sure you won’t have any of the same colors right next to each other. This seems easy, but it’s harder than I thought. It’s not just about how they line up vertically but horizontally too.
- You’ll need a few specialty tools like spacers (seen below lined up against the wall), an all-purpose cutting tool, and measuring tools for trimming around all those tricky corners, a mallet to pound the planks together, and a flooring cutter.
![]()
- Don’t forget you need to take off the trim around the bottom of the floor and doorways before you install the floor.
Below is a video of us working over the course of the four and a half days. It gives you a pretty solid look at how things work.
@prairiewifePhase 2 of ##diyhomeremodel done ✅ ##flooring ##vinylplankflooring ##familiesthatworktogether ##wyominglife ##newflooring ##getitdone♬ My House (Challenge Version) – Flo Rida
Now that we’ve had the flooring done for over a week, I can tell you that I am 100% happy with our choice. The slightly matte finish along with the variety of colors and the bit of texture of the planks means that the daily dirt, dust, and mud that comes with living in rural Wyoming barely show up.
This particular color goes with everything we have, from white distressed furniture to our dark antiques.
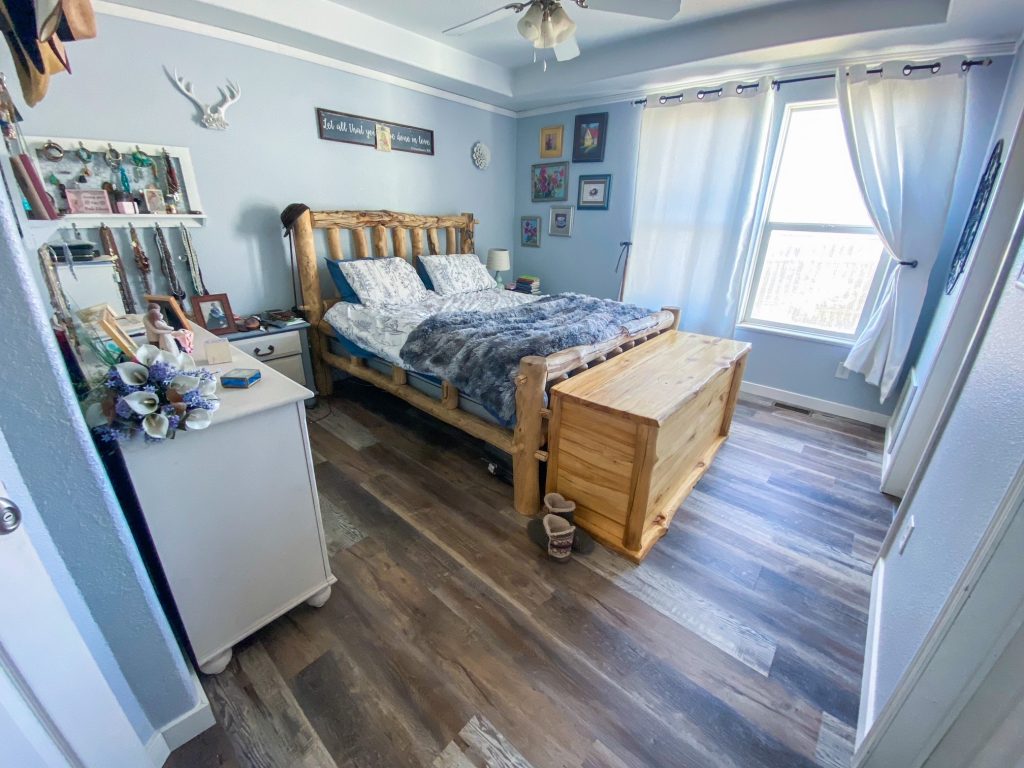
I was surprised at how much larger this flooring made our rooms look, I’m sure someone smart knows why…I was actually worried it would make them smaller because it’s a darker color than our carpet…but it didn’t.
I’m pleased that the light cream we picked for the walls went so well with the flooring too, and I can’t wait until we get done with the kitchen remodel (the next and final step in our remodel) and have the flooring throughout that area too.
Two notes…
- I learned that you need to be careful what rugs and backing you use on your vinyl plan flooring, apparently rubber can cause discoloration.
- We began this remodel in 2021 and now it’s 2022…but I’m going to continue to use the same title. Hopefully, that won’t confuse or irritate you!
Up next, the kitchen remodel!
If you follow us on Instagram and Facebook you can get some sneak peeks at all the work that has been happening 😉
Categories: For the Home, Prairie Wife Style, The Prairie Homestead
Tags: , diy remodel, flooring, home remodel, new flooring, prairie wife homestead, remodel, vinyl plank flooring
Previous Post « My Word For 2022 Is Grow
Next Post Oven Baked Grilled Cheese Sandwiches »